


Nâng cấp Virtual Cockpit cho Audi Q5 8R: Hướng dẫn lắp đặt hoàn chỉnh cho Q5 2009–2017 và SQ5
How Do You Install an Audi Q5 8R Virtual Cockpit on 2009–2017 Models?
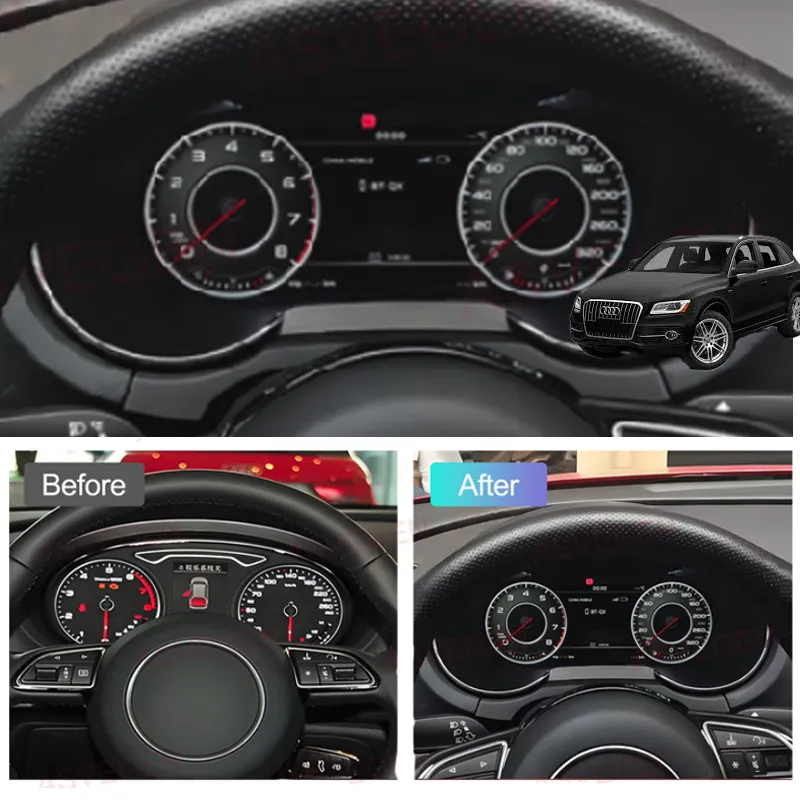
Câu trả lời ngắn gọn
For a compatible 2009–2017 Audi Q5 / SQ5 8R with the original mechanical instrument cluster, the retrofit route is to document the original vehicle state, remove the factory cluster, transfer the required original electronics into the new digital-cluster assembly, connect the matched no-cut harness, keep the update USB accessible, power-test the cluster before final closure, and then complete the required display and fuel calibration checks.
This is a vehicle-specific workshop procedure, not a universal compatibility promise. The exact supplied cluster version and the vehicle baseline still determine the final supported functions and menu routes.
This page is an iKAGOO Audi Q5 8R Virtual Cockpit Retrofit installation guide for compatible mẫu Audi Q5 / SQ5 8R đời 2009–2017 có cụm đồng hồ cơ nguyên bản. Đây được xây dựng như một quy trình xưởng có thể kiểm tra, chứ không phải là bảo đảm tương thích phổ quát, và không nên được hiểu là lời hứa rằng mọi chức năng, trạng thái cảnh báo hay biến thể xe đều hoạt động giống hệt nhau.
Ranh giới Plug-and-Play: Plug-and-Play nghĩa là không cắt hoặc nối chắp bó dây nguyên bản của xe. Nó vẫn yêu cầu tháo rời bảng táp-lô, chuyển bo mạch gốc, kiểm tra bo phụ khi áp dụng, đi dây cáp USB, xác minh cài đặt và hiệu chuẩn.
Phạm vi theo đời xe Audi Q5 8R: Hướng dẫn này được viết cho thế hệ Audi Q5 / SQ5 8R, thường được bán dưới tên 2009–2017 tại các thị trường châu Âu và Bắc Mỹ. Nó chỉ áp dụng cho các xe tương thích với lộ trình cụm đồng hồ cơ nguyên bản. Mọi tham chiếu cài đặt chung của Audi / Volkswagen chỉ nên được áp dụng khi phiên bản cụm Q5 được cung cấp sử dụng cùng đường dẫn menu.
Which Audi Q5 8R Models Does This Virtual Cockpit Installation Guide Cover?
Direct answer
This installation route is written for compatible first-generation Audi Q5 / SQ5 8R vehicles using the original mechanical instrument cluster. For iKAGOO hardware, the working fitment range on this guide remains 2009–2017. The vehicle must still be confirmed from the original cluster and dashboard photos before ordering or dismantling.
Audi sold the first-generation Q5 under different engine, trim and marketing names in Europe and North America. Those names are useful for identifying the vehicle, but engine name, trim level or model badge alone does not prove cluster compatibility. The physical original cluster route is the deciding reference.
North America: Audi Q5 / SQ5 8R
- Audi Q5 8R / first-generation Q5: U.S. model years 2009–2017.
- Common Q5 names: Q5 2.0T / 2.0 TFSI quattro, Q5 3.2 FSI quattro, Q5 3.0T / 3.0 TFSI quattro, Q5 TDI / 3.0 TDI clean diesel quattro, and Q5 hybrid quattro.
- Performance model: Audi SQ5 8R, commonly identified in North America as the 3.0 TFSI / 3.0T quattro model.
- Trim names seen in the U.S. and Canada: Premium, Premium Plus and Prestige. Trim name does not replace photo-based fitment confirmation.
- Not this generation: U.S. model-year 2018 and later Q5 vehicles belong to the next-generation route and must not use this installation procedure.
Europe: Audi Q5 / SQ5 8R
- Audi Q5 8R / first-generation Q5: the first generation was introduced in Europe in 2008; this iKAGOO guide keeps a 2009–2017 confirmed sales/fitment boundary. A 2008-registered vehicle requires individual confirmation before this guide is used.
- Common petrol names: Q5 2.0 TFSI, Q5 3.2 FSI, Q5 3.0 TFSI and Q5 hybrid quattro.
- Common diesel names: Q5 2.0 TDI and Q5 3.0 TDI quattro.
- Performance names: SQ5 TDI, SQ5 TDI plus and, in applicable markets, SQ5 TFSI. These names describe the vehicle version; the original cluster still has to match the supported route.
- Body-generation wording: Q5 8R, Q5 Mk1, first-generation Q5, pre-facelift Q5 8R and facelift Q5 8R may all be used by owners and workshops.
Useful search and identification terms: Audi Q5 8R virtual cockpit, Audi Q5 digital instrument cluster, Audi Q5 LCD cluster, Audi Q5 8R digital dash, Audi Q5 Mk1 virtual cockpit, Audi SQ5 8R digital cluster, Audi Q5 2009–2017 instrument cluster retrofit.
Giới hạn tương thích: These names are included so European and North American owners can identify the correct generation. They are không a statement that every engine, trim, country specification or factory option uses identical electronics.
What must be confirmed before any removal work?
- Chính xác mẫu xe và năm sản xuất.
- Original mechanical instrument cluster photographed while powered on.
- Full dashboard and instrument surround photo.
- LHD or RHD configuration.
- Any warning lights or messages already present before the retrofit.
- Any previously installed non-original electronics, adapters or modified wiring.
Do not dismantle first and confirm later. The original powered-on cluster photo is the baseline for comparing warnings, cluster shape and donor-board configuration. If the vehicle does not match the documented 8R mechanical-cluster route, stop and confirm fitment before continuing.
What Settings Should Be Checked Before Removing the Audi Q5 8R Factory Cluster?
Direct answer
Before removing the original mechanical cluster, document the current warning state. Where the original menu provides these functions, set the Cảnh báo về lốp xe mùa đông và vehicle speed limit warning to the maximum available value, then turn the warning functions off in the multi-function speed-limit menu.
1. Record the original condition
Switch the ignition on and photograph the cluster before dismantling. Capture mileage, fuel level and any visible warning lamps or messages that may matter later.
Why: After the new display is installed, you need a reliable before/after reference. A warning that already existed should not be diagnosed as a retrofit fault.
2. Normalize the available warning settings
Enter the original vehicle menu. Set the winter tire warning and speed-limit warning to the maximum available value, then turn the relevant warning functions off where the menu allows it.
Before moving on: Photograph the final menu state so the installer can compare it after power-on.
Version boundary: Menu wording can vary by vehicle specification. If the supplied vehicle does not show the same setting path, do not force a different Audi/VW menu route simply because it appears in another cluster version.
How Do You Remove the Original Audi Q5 8R Mechanical Instrument Cluster?
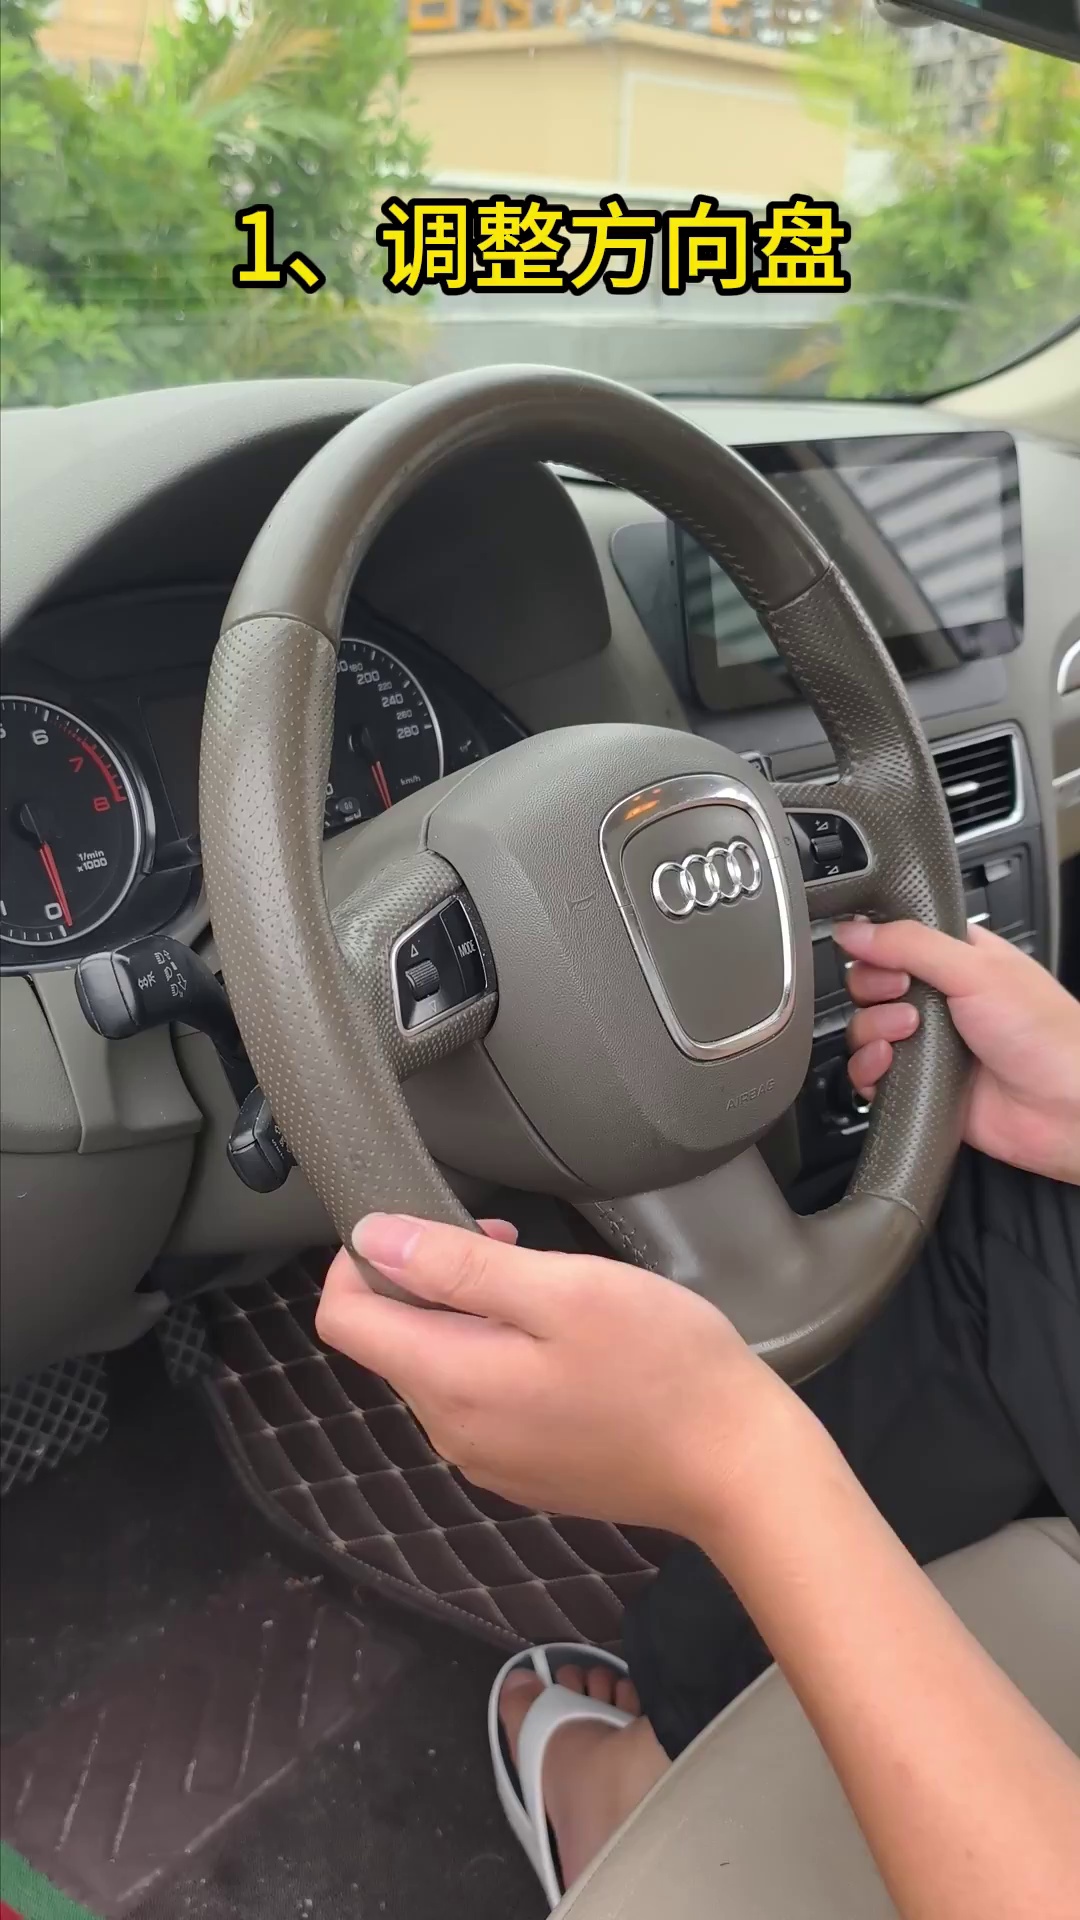
Hạ vô lăng và tháo tấm chắn bụi phía dưới
Move the steering wheel to its lowest practical position to create working clearance in front of the factory cluster. Release the lower dust shield / lower trim carefully instead of pulling the cluster against it.
- Do: create enough clearance for the cluster to move forward without scraping the trim opening.
- Kiểm tra: the lower shield should move freely and should not remain hooked against the cluster edge.
- Avoid: levering directly against the clear cluster face or forcing a trim edge that has not released.
- Dừng lại nếu: the trim resists strongly; re-check the retained points before applying more force.
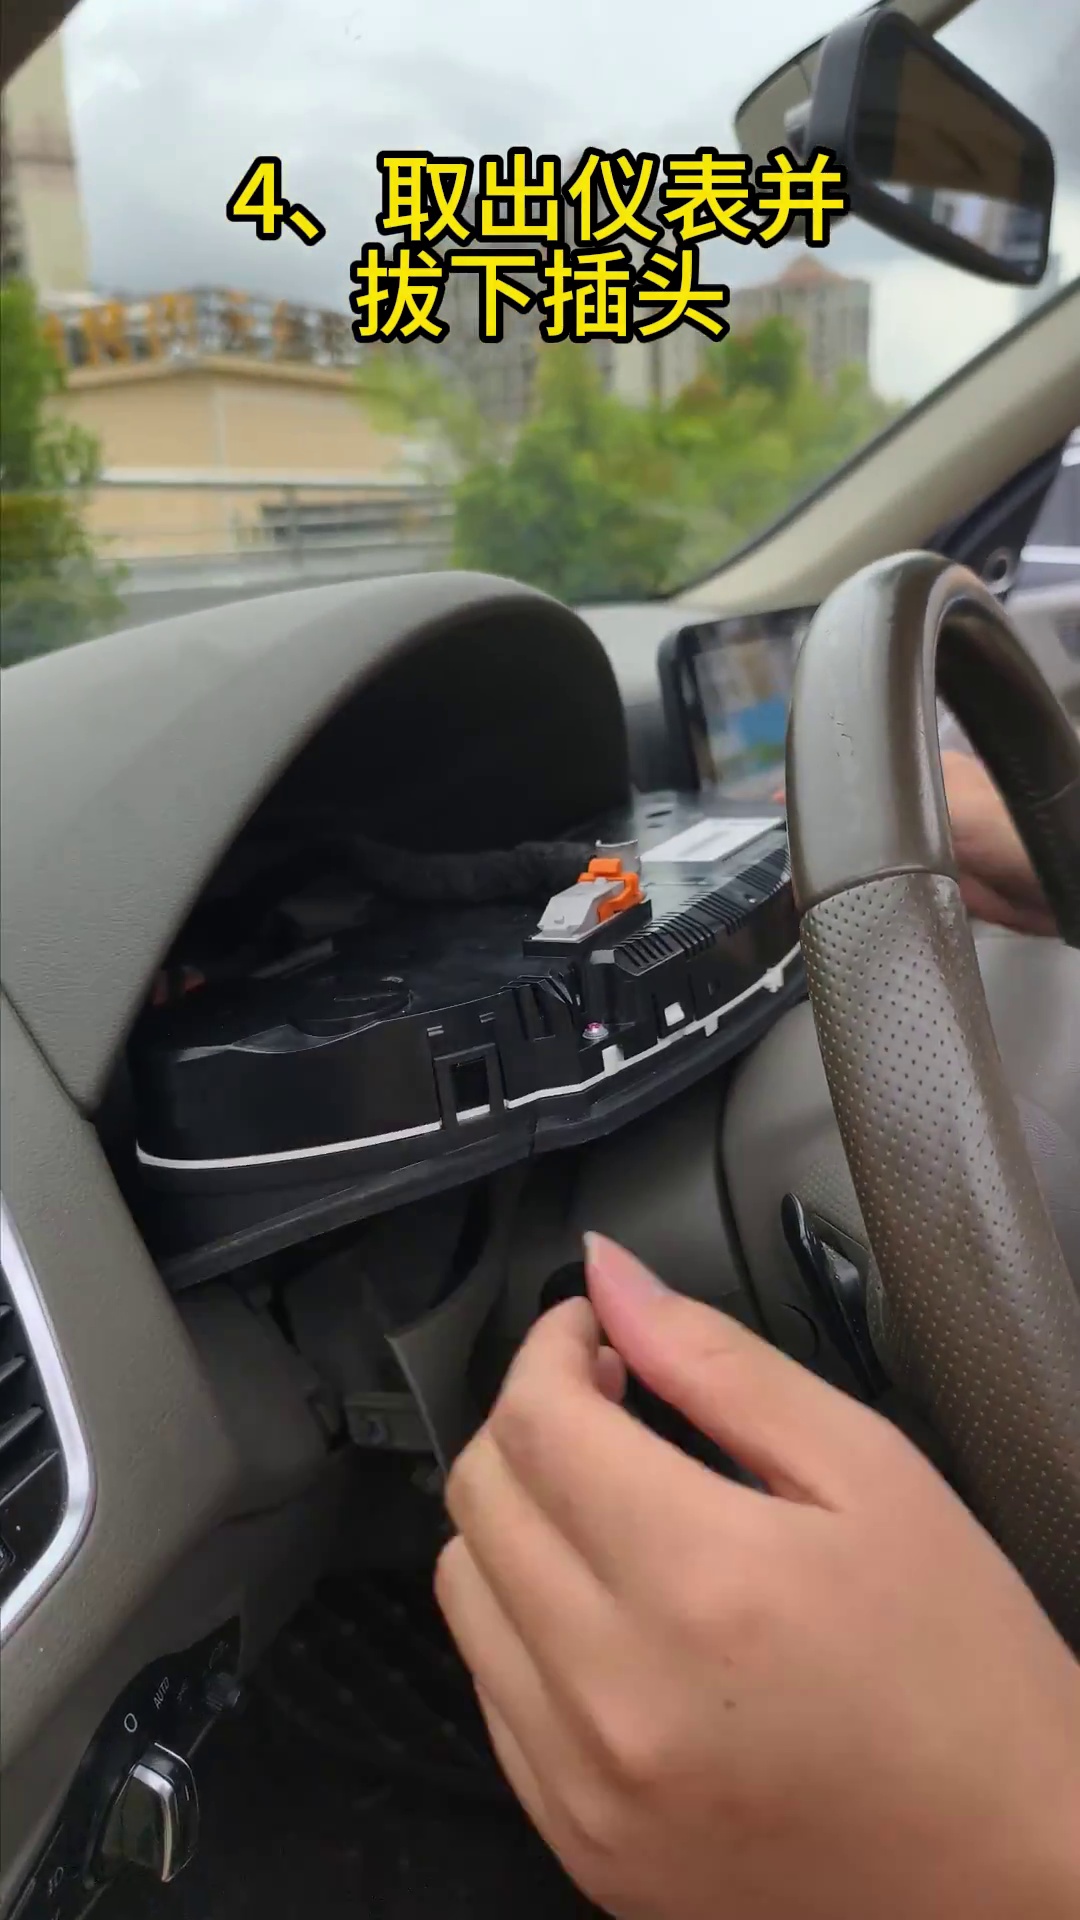
Remove the retained screws, pull the cluster forward and disconnect the factory plug
Remove the original retained screws. Support the cluster with both hands, bring it forward in a controlled movement, then access the factory connector. Release the connector by its locking mechanism rather than pulling on the wire bundle.
- Do: support the cluster while the last fixing point is released.
- Kiểm tra: the connector and terminals should look straight and undamaged after disconnection.
- Avoid: twisting the connector, pulling on wires or placing the removed cluster face-down on a hard surface.
- Next: move the complete original cluster to a clean padded bench because its electronics are required for the retrofit route.
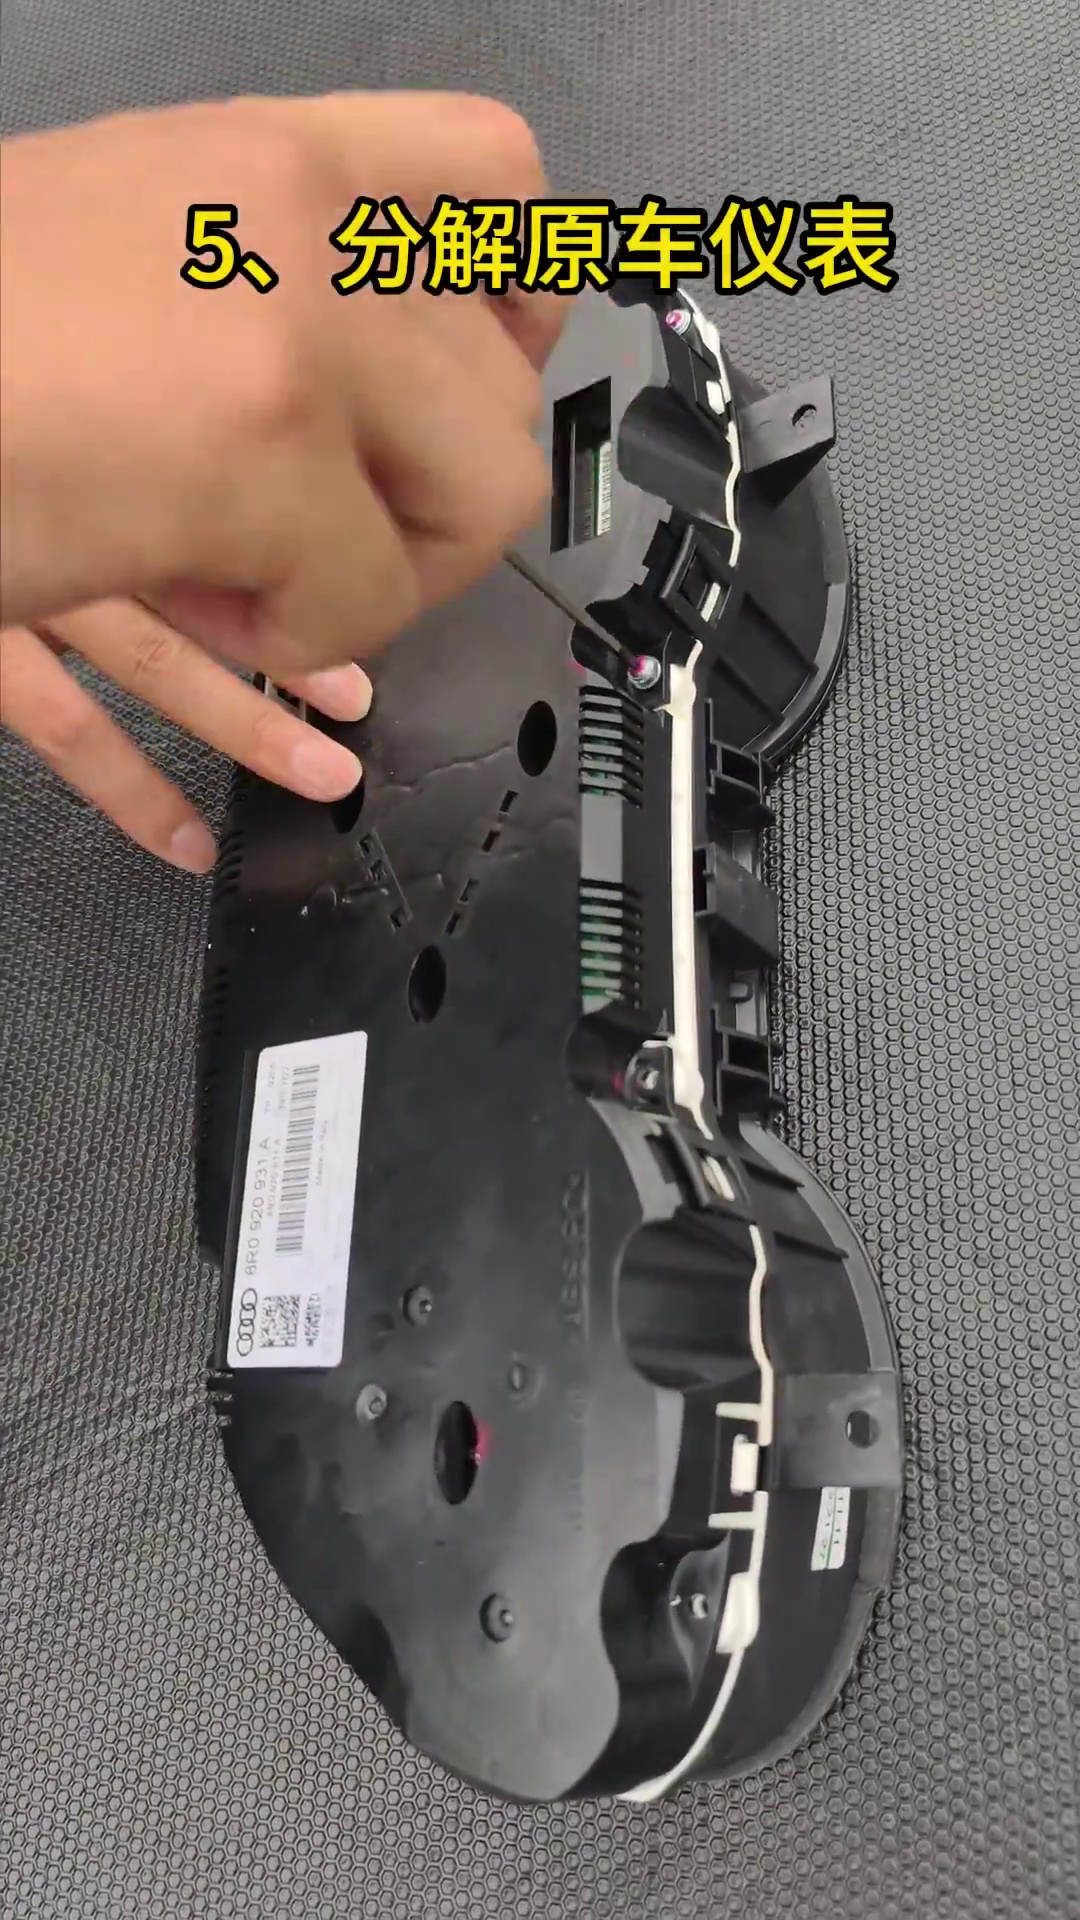
How Do You Transfer the Original Audi Q5 8R Cluster Electronics Into the Digital Cluster?
Open the donor cluster on a clean, padded and static-safe work surface
Place the original mechanical cluster on a padded bench. Before touching the PCB, discharge body static by touching grounded metal. Open the housing carefully and keep removed screws and housing pieces grouped in their original order.
- Handle the PCB by its edges. Avoid touching chips, soldered components and contact surfaces.
- Keep hardware organized. Do not mix screws from different housing locations.
- Inspect before transfer. Look for existing damage, contamination or previous repair marks.
- Dừng lại nếu: the donor board is visibly damaged or the cluster has been modified in a way that does not match the documented route.
Inspect the original cluster for the small auxiliary board and transfer it when present
Some higher-specification mechanical clusters include a small auxiliary circuit board behind the original small display. If your donor cluster has this board, it must be positioned and secured inside the new LCD cluster assembly as shown by the supplied route. If the donor cluster does not have the board, do not add one simply because another vehicle has it.
- Look first: inspect behind the original small display before discarding or closing any donor parts.
- If present: secure the board in the required position so it cannot move inside the new housing.
- Why: an omitted or loose auxiliary board can be associated with inaccurate fuel indication or instrument warnings on applicable versions.
- Before closing: compare the board position with the reference image and confirm it is not pressing against the LCD or wiring.
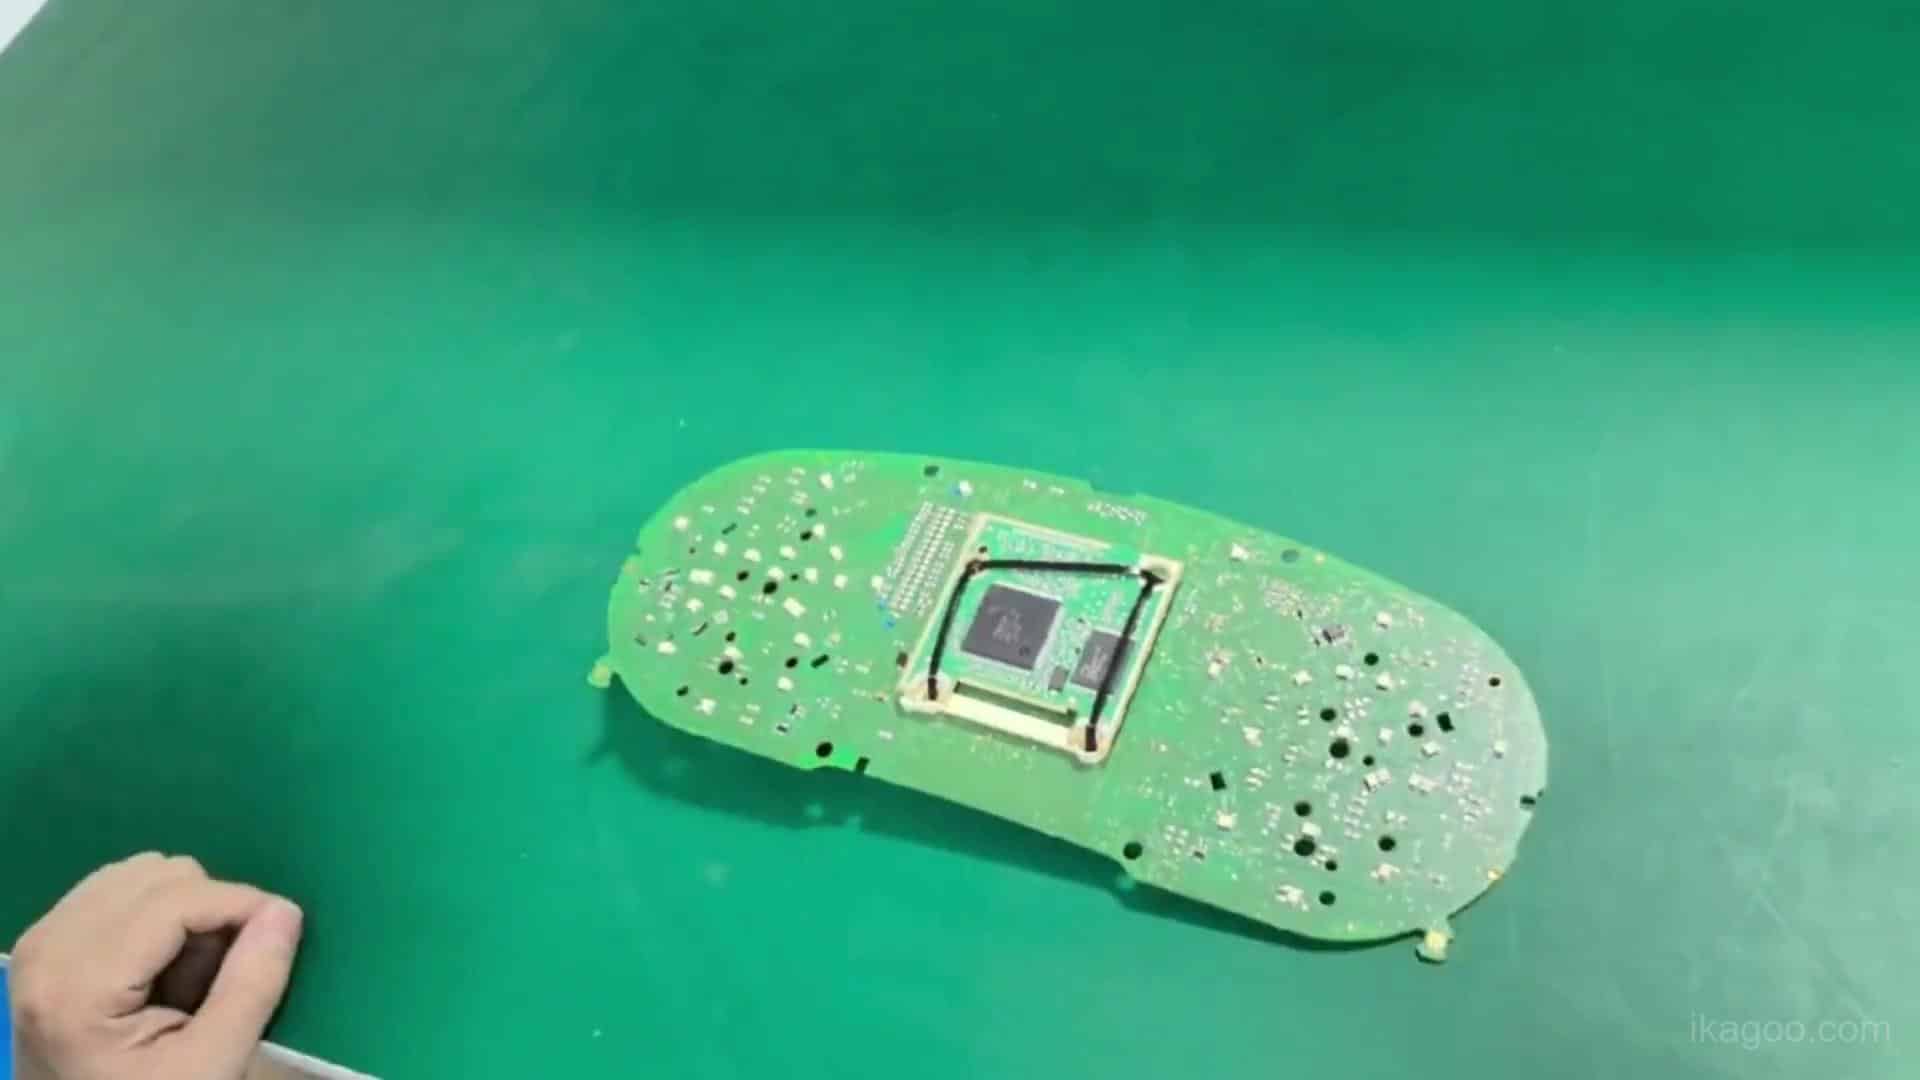
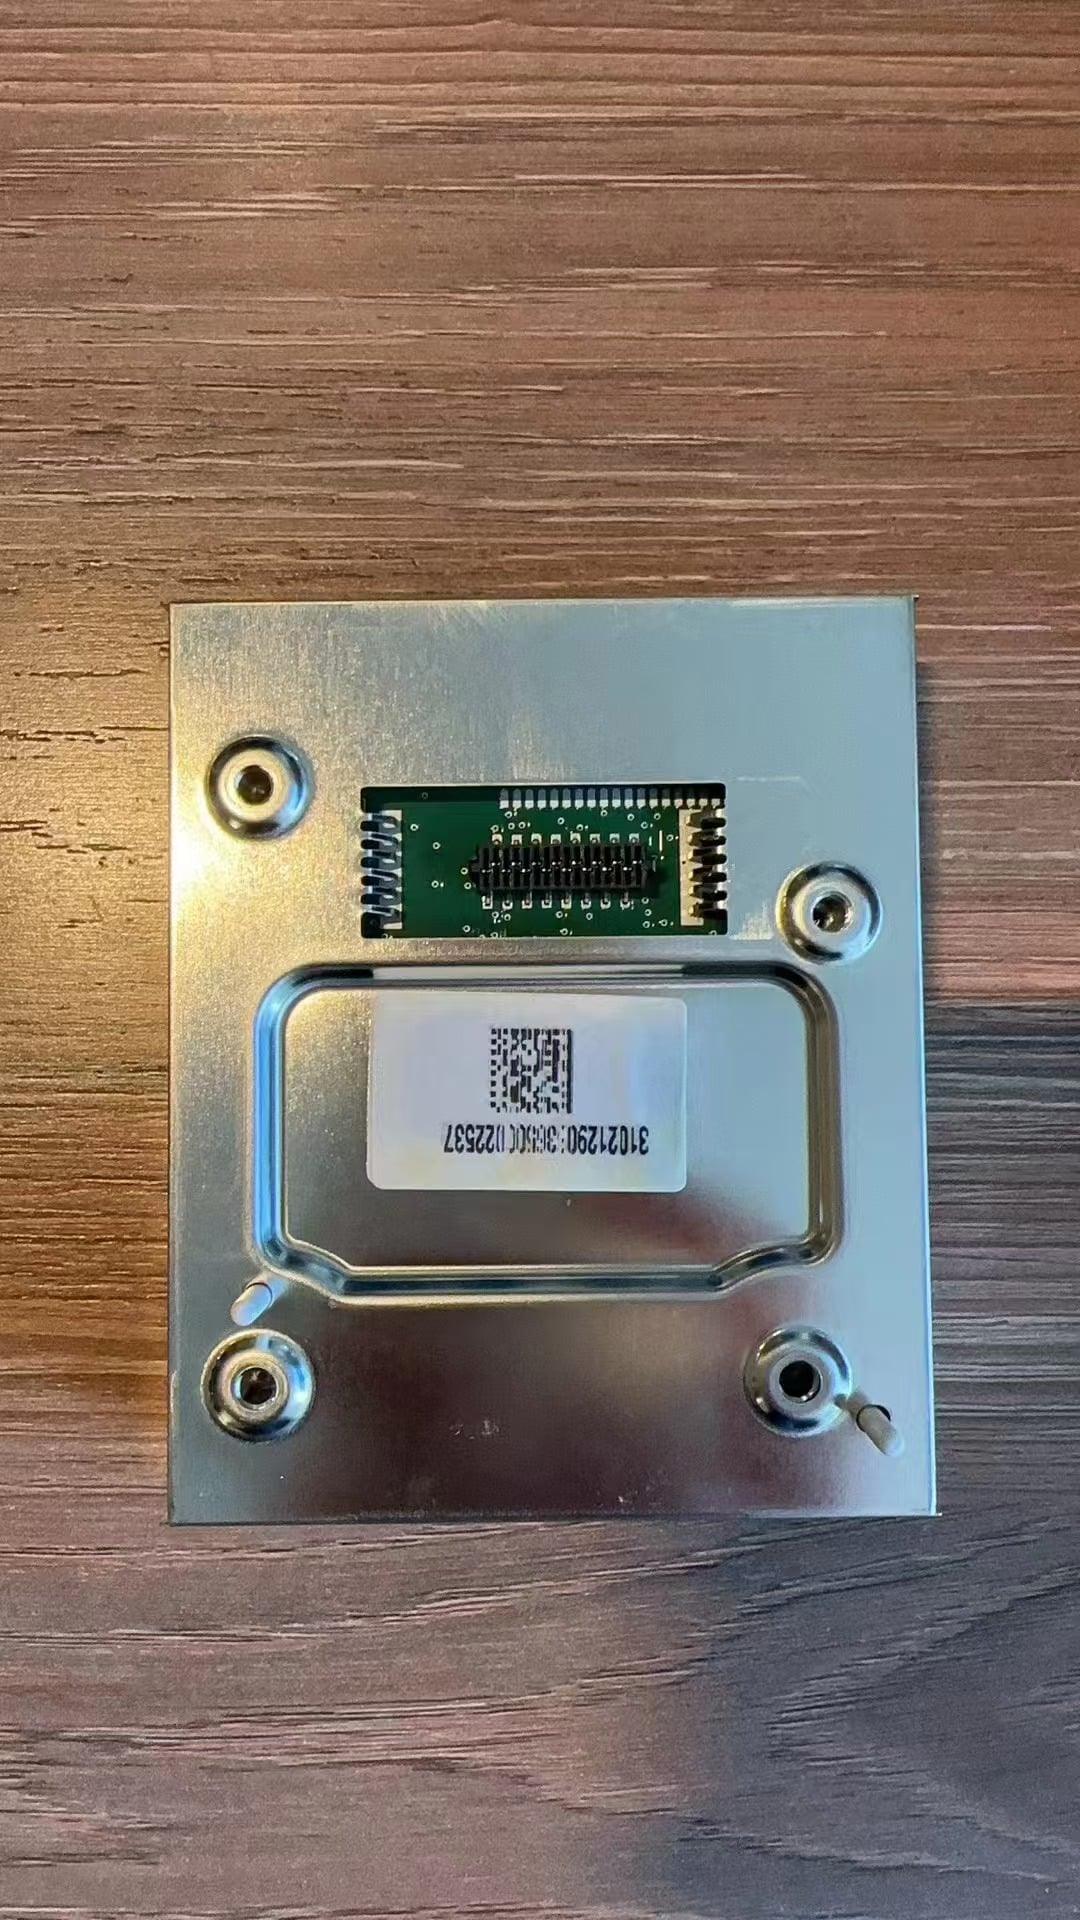
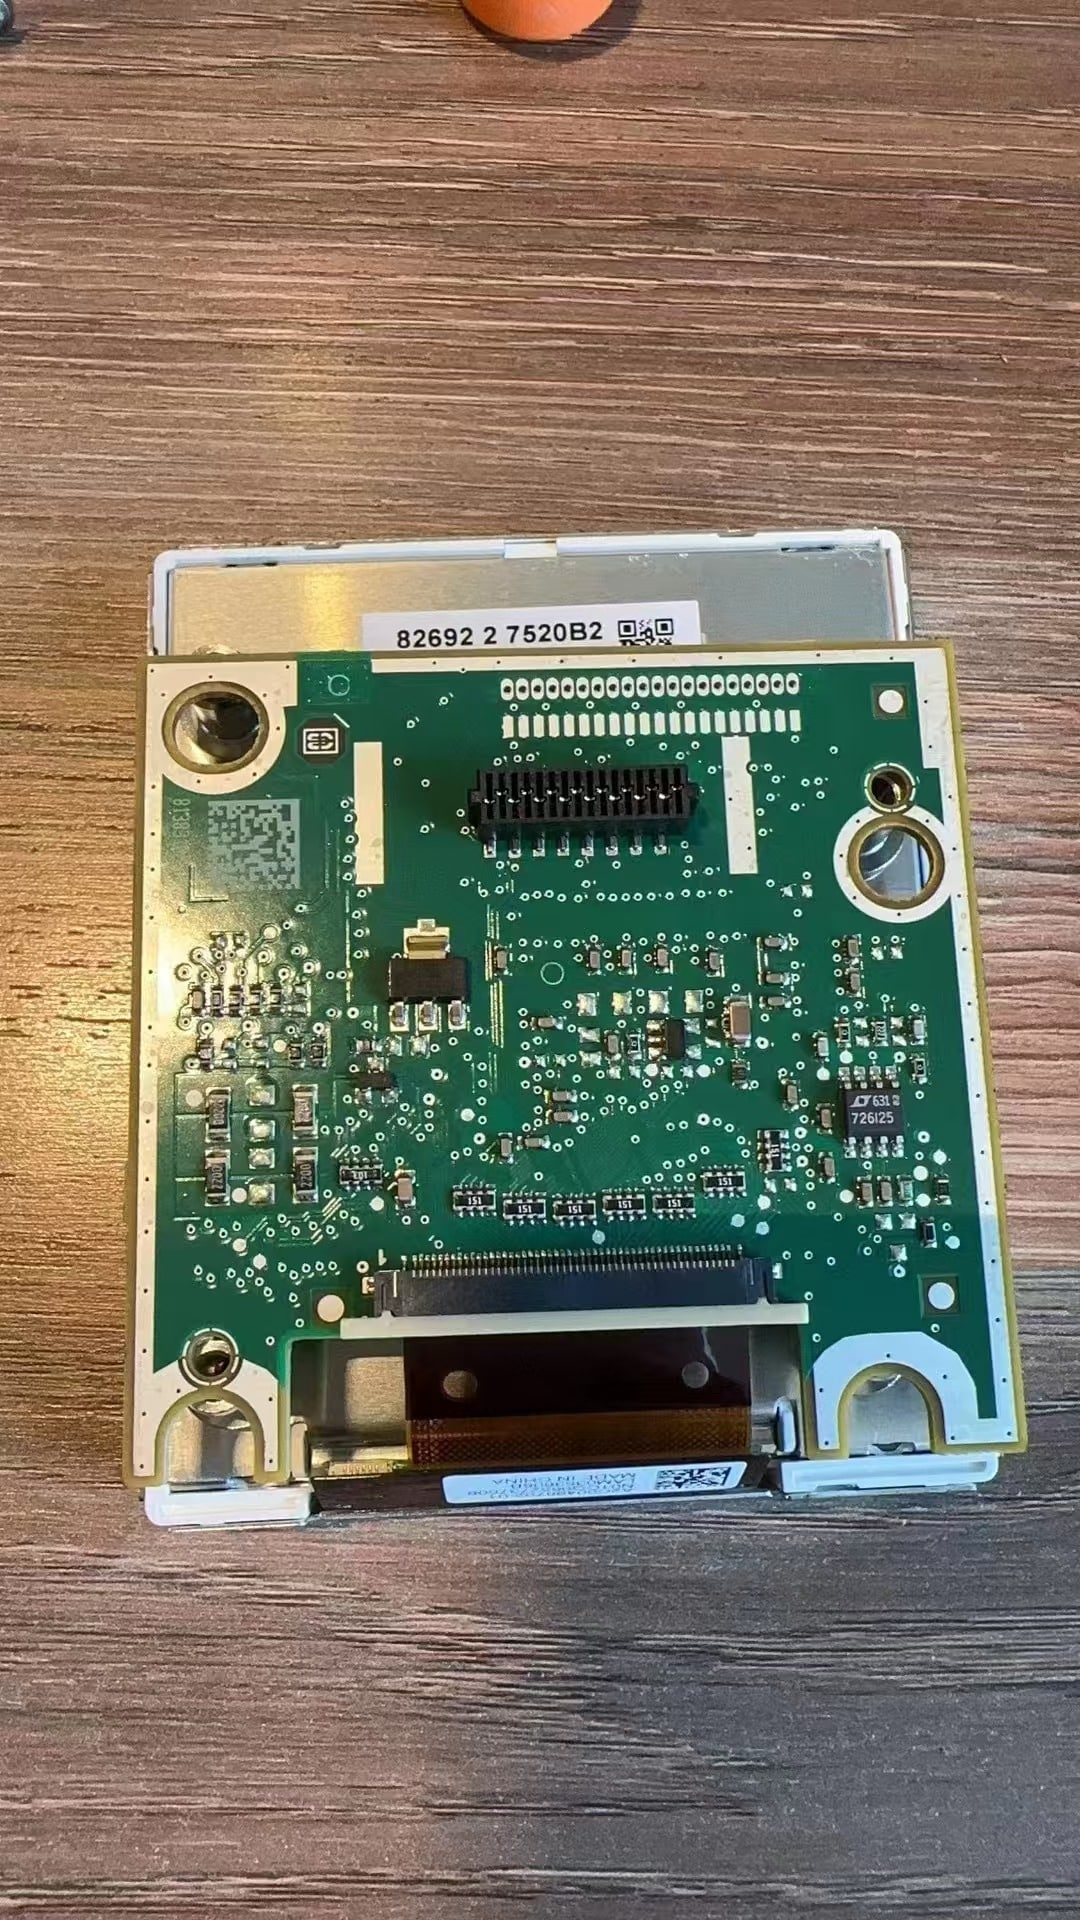
Transfer the original main board into the new digital-cluster housing
Move the retained original main board into the new digital-cluster assembly without bending or twisting it. Align the mounting and mating points before applying pressure. Keep the PCB flat and make sure the auxiliary-board route, where applicable, has already been handled correctly.
- Seat the board flat: no corner should remain lifted or under tension.
- Fully seat connections: do not leave a ribbon, socket or mating point partly engaged.
- Keep wires clear: no wire should pass under a PCB edge or housing screw point.
- Before closing: visually inspect the complete perimeter of the board and confirm nothing is trapped.
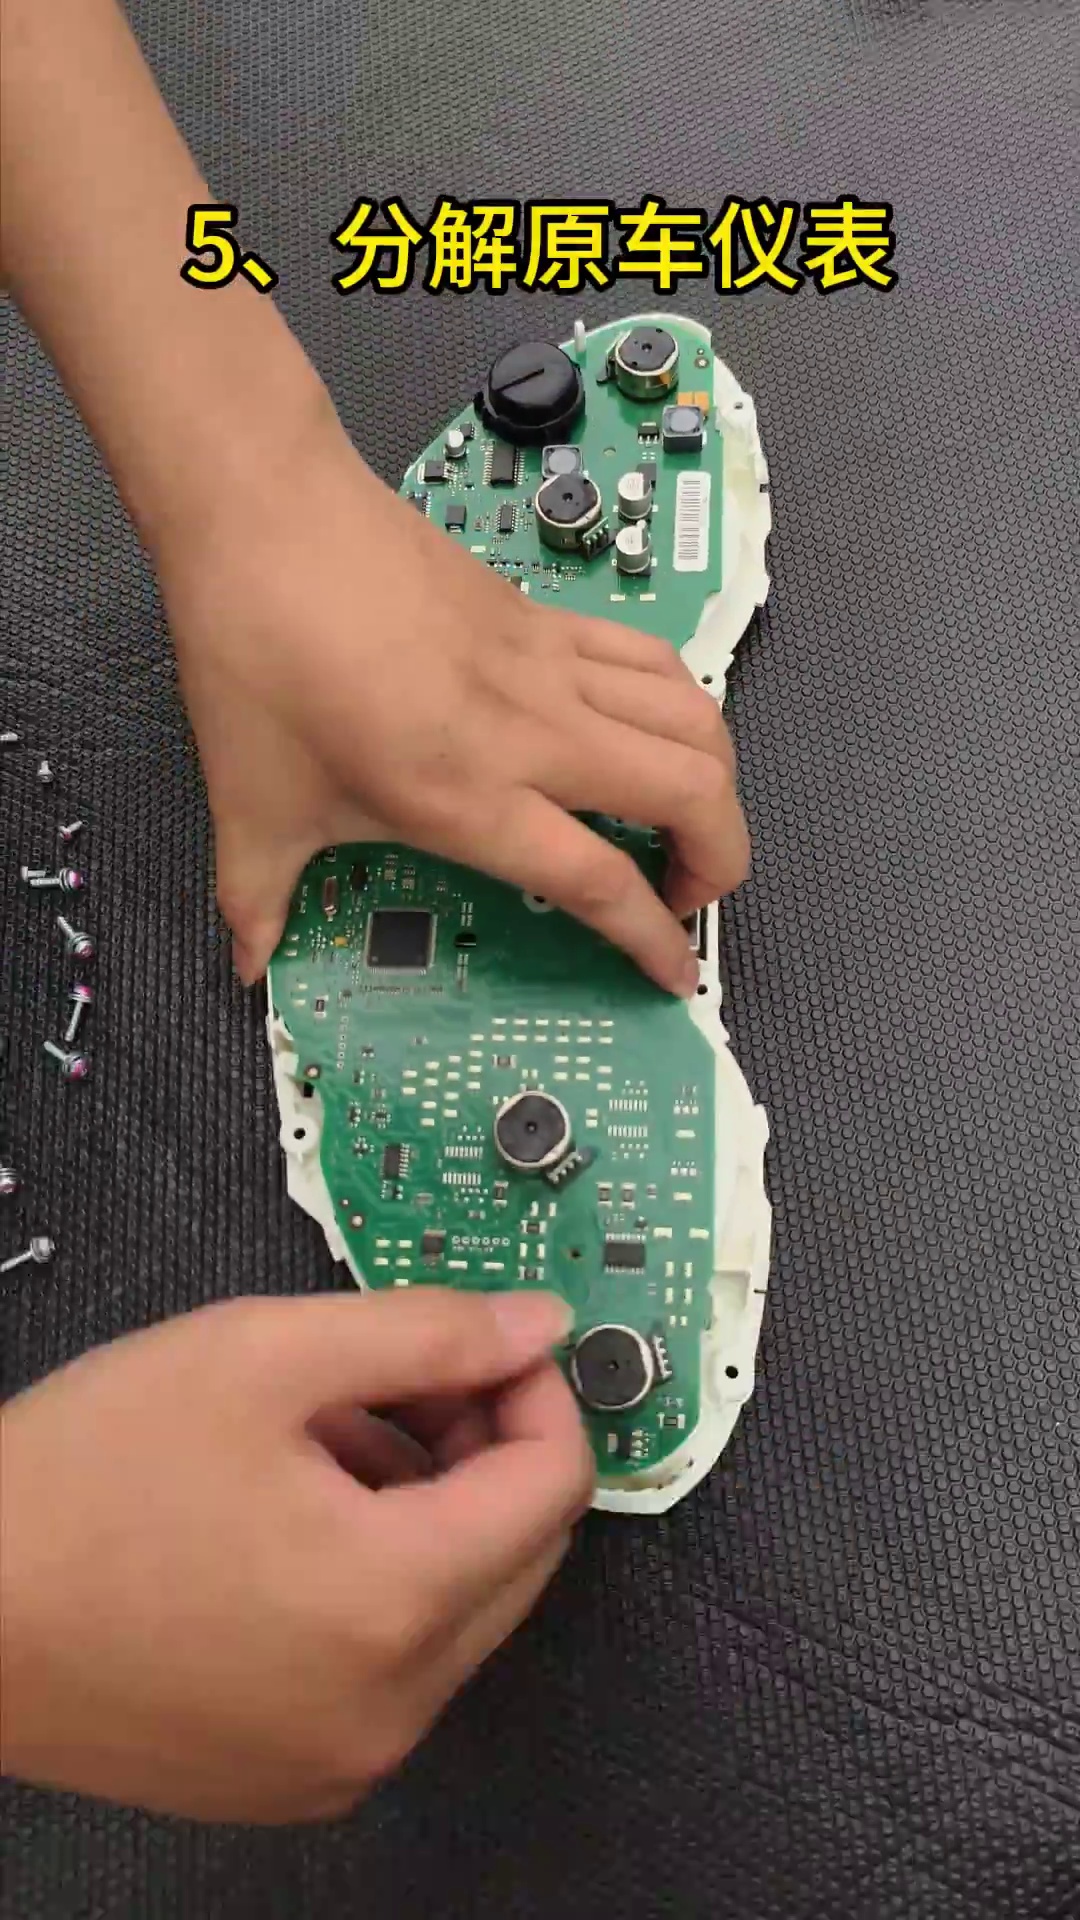
Connect the matched plug-and-play harness and route both USB leads before seating the cluster
Connect the supplied matched harness to the correct mating points without cutting or splicing the factory vehicle wiring. Align each connector before pushing it home. At the same stage, route the two supplied USB leads toward an accessible lower storage area near the steering wheel where practical.
- Plug-and-play meaning: no cutting or splicing of the original vehicle harness; dashboard disassembly and electronics transfer are still required.
- Harness check: every connector should be fully seated and the loom should have enough slack to avoid tension.
- USB 1: keep the wired software-update USB accessible.
- USB 2: keep the supported wired mirroring / projection USB accessible where the supplied cluster version provides this function.
- Avoid: trapping the harness or USB leads behind a sharp housing edge when the cluster is pushed back into the dashboard.
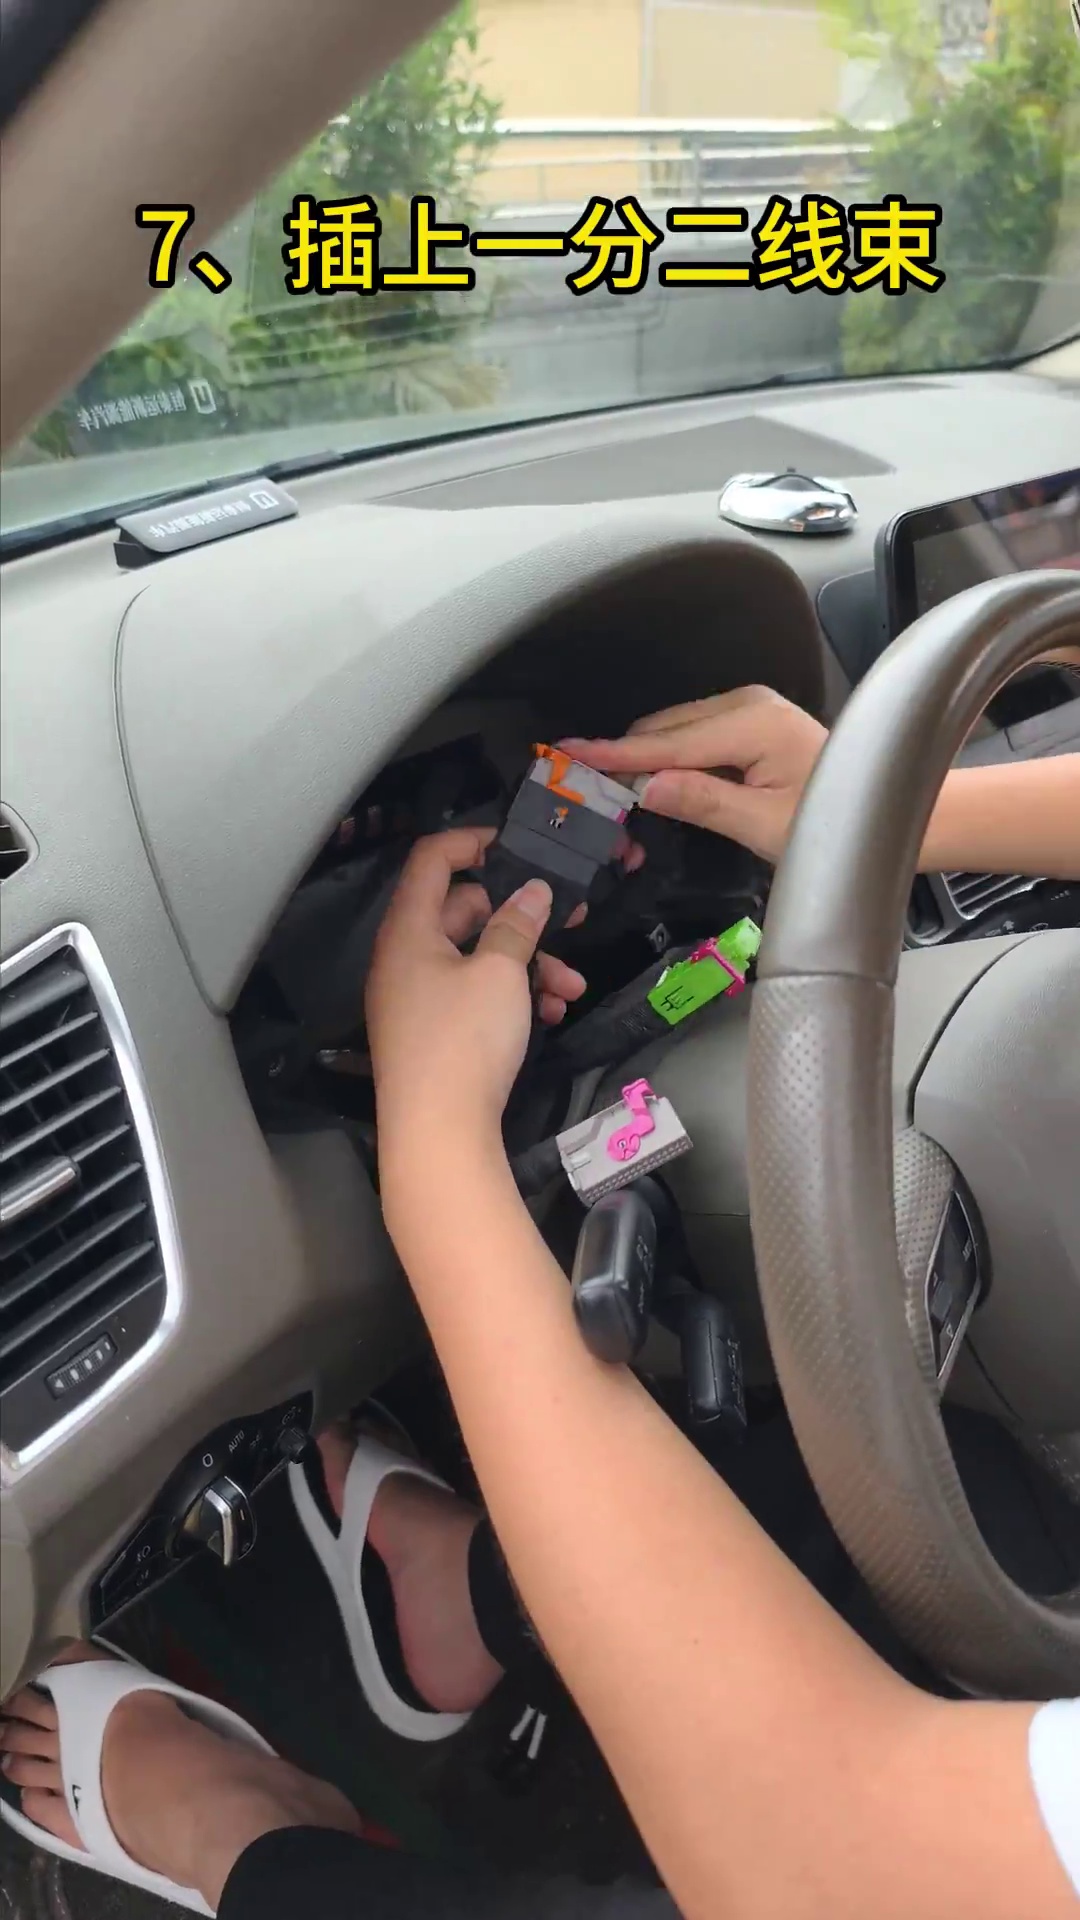
Where Should the Audi Q5 Digital Cluster USB Cables Be Left After Installation?
Direct answer
Do not bury the supplied USB leads permanently behind the dashboard. Keep the software-update USB and, where supported by the supplied version, the wired projection / screen-mirroring USB reachable from a practical lower storage area near the steering wheel.
Before final seating: pull each USB lead gently from the planned access point and confirm it remains free. Leave enough slack so the connector is not loaded when the cluster is pushed into position.
Tại sao điều này quan trọng: future software support or a supported wired projection check should not require unnecessary dashboard disassembly.
Version boundary: USB functions can vary by supplied hardware/software version. Keep the physical access route, but only claim the USB functions confirmed for the exact cluster supplied.
What Must Be Tested Before the Audi Q5 8R Dashboard Is Closed?
Power on the digital cluster before final fastening
With the cluster connected but still accessible, switch the ignition on and let the LCD start. Do not close the lower trim yet. Compare the new display with the photos taken before removal.
- Startup: confirm the LCD powers on normally and does not repeatedly restart.
- Screen condition: check for lines, dark pressure areas, cracks, abnormal bright areas or visible panel damage.
- Warnings: compare warning lamps/messages with the original powered-on cluster record.
- Basic vehicle data: confirm the visible information expected for the confirmed vehicle route is present before closing the dashboard.
- If a new problem appears: stop and recheck the transferred main board, auxiliary board if applicable, harness routing and connector seating before considering software.
LCD safety: do not press on the display surface during testing or seating. Cracks and dark pressure marks are physical handling issues and cannot be repaired by software.
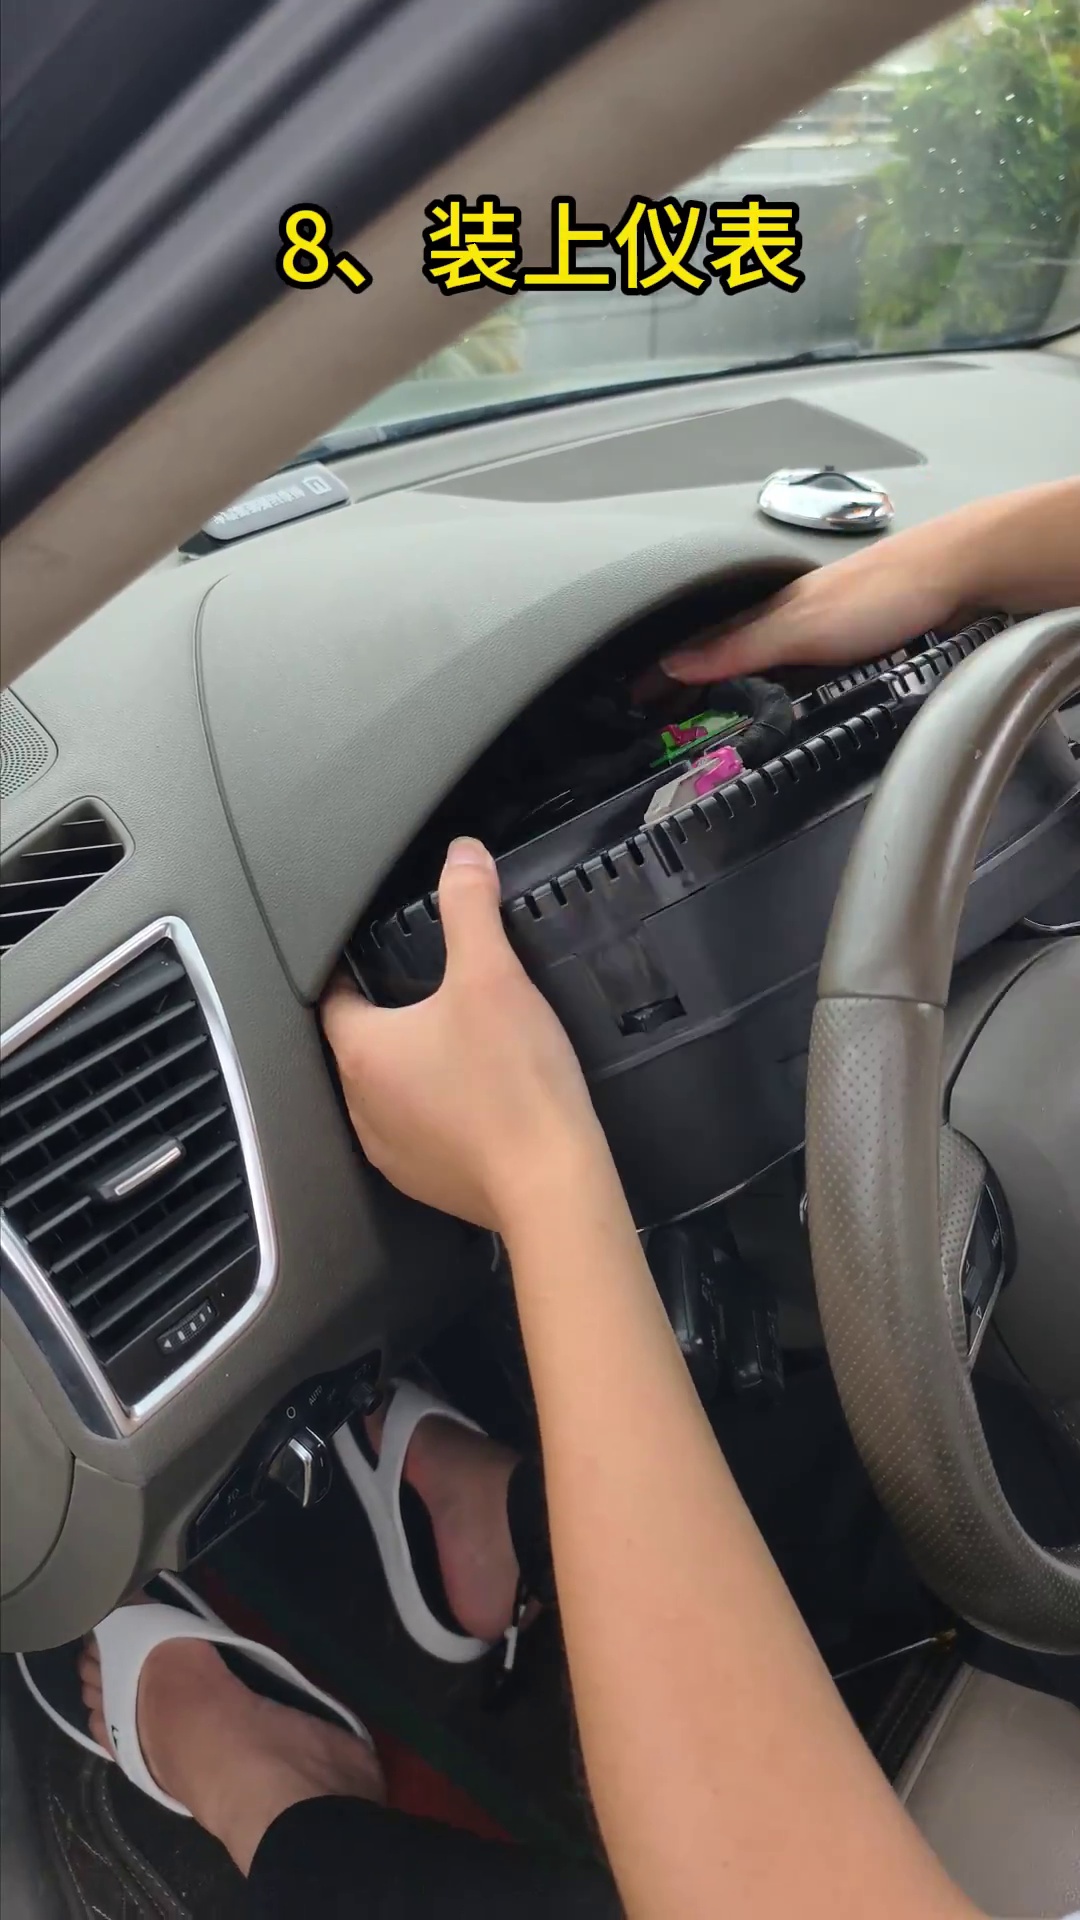
Seat the cluster evenly, reinstall the retained screws and close the lower trim
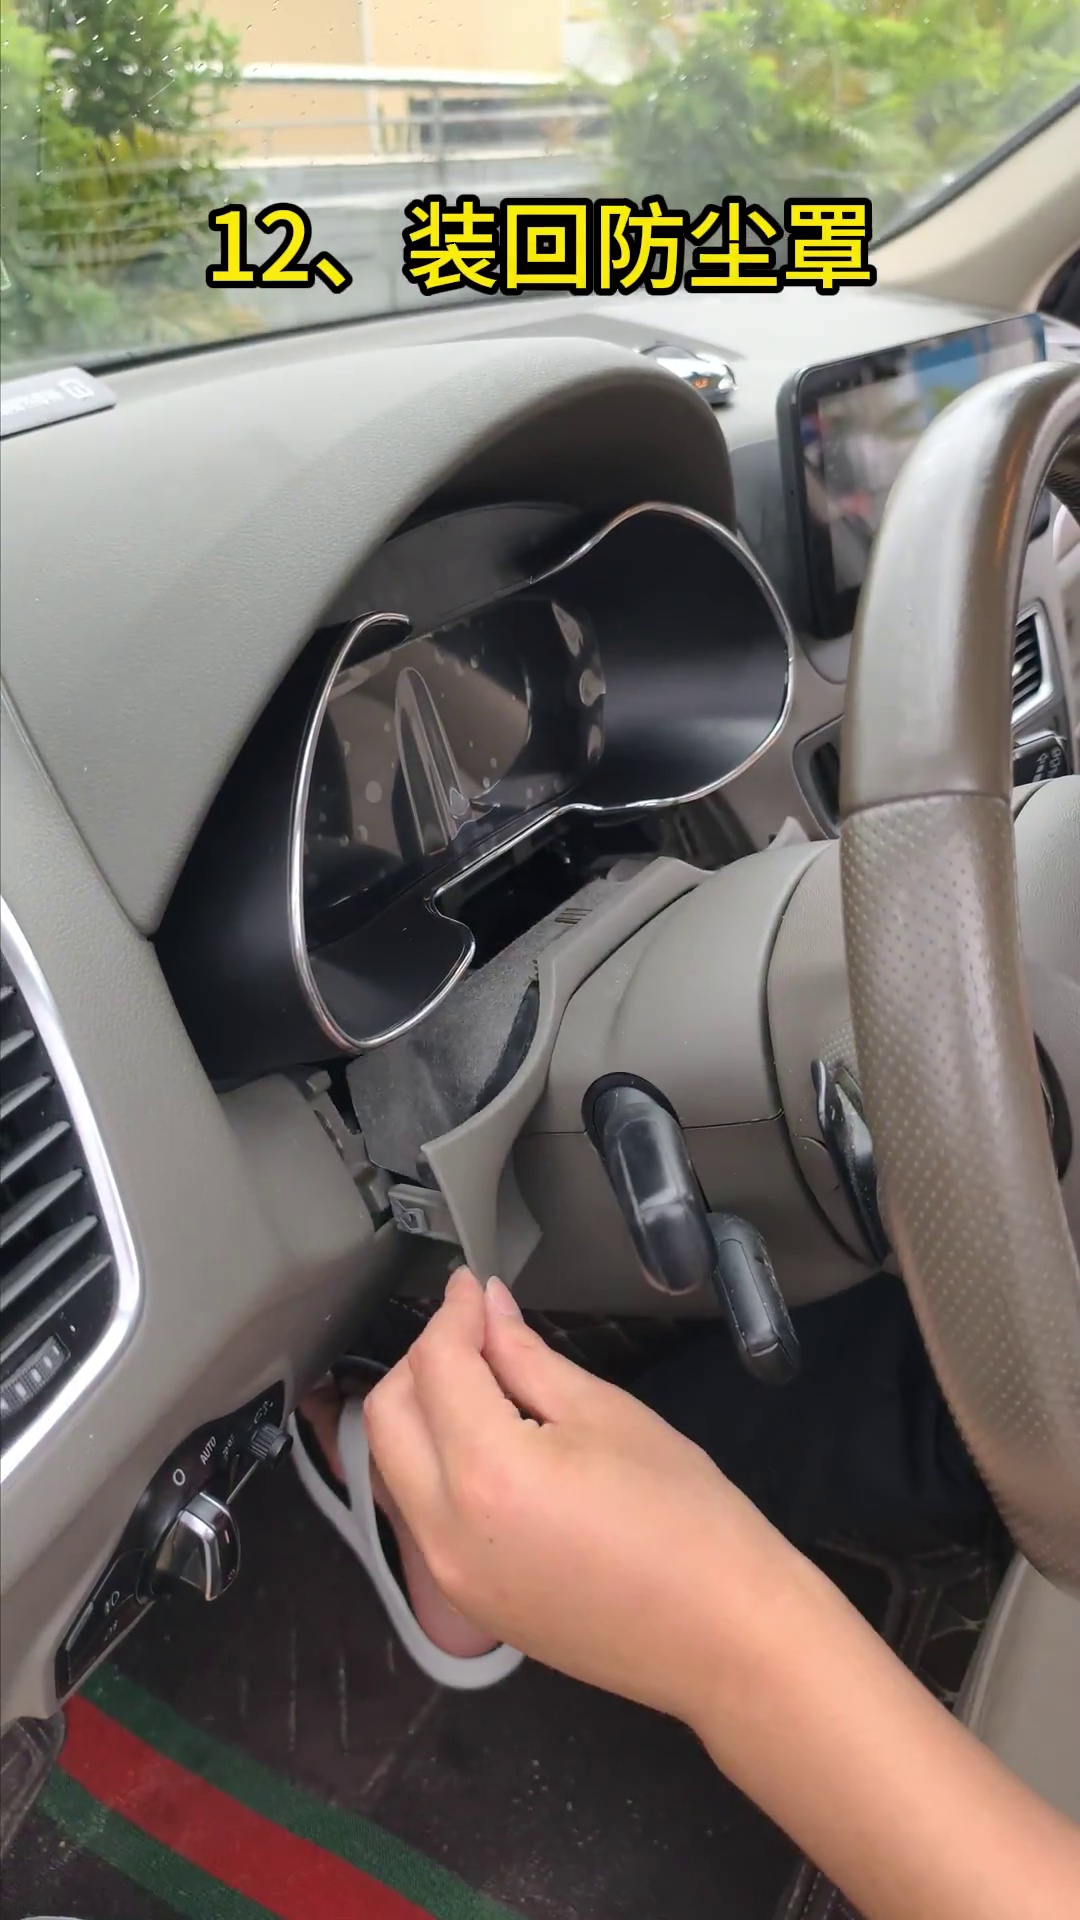
Only after Step 07 passes should the cluster be moved into its final position. Guide the harness and USB leads behind it without folding them sharply. Reinstall the retained fixing screws, then refit the lower dust shield / trim.
- Tương thích: the digital cluster should sit evenly in the opening without one side being forced inward.
- Cable clearance: no harness or USB lead should be pinched between the housing and dashboard structure.
- Lower dust shield: adjust only where actual clearance requires it; do not remove more material than necessary.
- Final pressure check: the refitted trim must not press against the LCD surface or cluster housing.
- Final ignition check: power the vehicle on again after closure and confirm the display state has not changed.
How Do You Calibrate the Fuel Gauge After an Audi Q5 8R Digital Cluster Retrofit?
Direct answer
Fill the fuel tank completely, drive a few hundred meters, then open Dữ liệu lái xe → Lượng có thể nạp lại. Use the displayed refillable amount as the value entered under Cài đặt → Hiệu chỉnh cấu hình → Dung tích bình nhiên liệu. After successful calibration, the refillable amount should return to 0 and the fuel gauge should show full.
- Fill the vehicle’s fuel tank completely.
- Drive a few hundred meters so the display state updates.
- Mở Dữ liệu lái xe → Lượng có thể nạp lại and note the value shown.
- Mở Cài đặt → Hiệu chỉnh cấu hình → Dung tích bình nhiên liệu.
- Enter the refillable amount value recorded in the previous step.
- Recheck the display. The refillable amount should return to 0 and the gauge should indicate a full tank.
If the result is still wrong: on vehicles whose donor cluster contained the small auxiliary board, confirm that the board was retained and fixed correctly before repeatedly changing calibration values.
Giữ Physical Light ở trạng thái tắt nếu cài đặt này xuất hiện trong phần mềm cụm đồng hồ được cung cấp
Câu trả lời trực tiếp: If the supplied software shows a Ánh sáng vật lý option, keep it disabled unless the documented correction route specifically requires checking it, because an incorrect setting can affect turn-signal display behavior.
Chỉ điều chỉnh đồ họa hiển thị mẫu xe sau khi đã xác nhận lắp đặt phần cứng
Nếu hình đồ họa mẫu xe nhỏ không khớp với xe thực tế, hãy vào Cài đặt → Chọn mẫu xe. Chọn mẫu phù hợp nếu có. Sau khi chọn, tắt xe, khóa xe và chờ vài phút. Thao tác này chỉ thay đổi đồ họa mẫu xe hiển thị. Nó không thay thế việc xác nhận tính tương thích của phần cứng. Vì sao điều này quan trọng: Người dùng thường nhầm lẫn giữa việc mẫu hiển thị không khớp và việc phần cứng không khớp. Menu này chỉ thay đổi phần đồ họa hiển thị. Cách kiểm tra: Thay đổi đồ họa mẫu xe, khóa xe và chờ vài phút trước khi kiểm tra trạng thái hiển thị mới. Nếu bỏ qua: Khách hàng có thể cho rằng đường dẫn phần cứng bị sai, trong khi thực tế chỉ cần điều chỉnh biểu tượng mẫu xe hiển thị.Danh sách kiểm tra cuối cùng trước khi Audi Q5 trở lại sử dụng bình thường
| Kiểm tra mục | Cần xác minh gì | Nếu không đạt |
|---|---|---|
| Khởi động màn hình | LCD khởi động bình thường trong lần kiểm tra bật khóa điện đầu tiên. | Dừng đóng hoàn thiện và kiểm tra lại giai đoạn chuyển bo mạch cùng độ khớp của đầu nối. |
| Bo mạch nhỏ phụ trợ nếu có | Nếu cụm đồng hồ nguyên bản có bo mạch nhỏ, hãy xác nhận nó đã được cố định và lắp đặt đúng cách. | Mở lại cụm lắp ráp và chỉnh lại vị trí bo mạch phụ trước khi đổ lỗi cho phần mềm. |
| Tình trạng màn hình | Không có vệt sọc, vùng đen do áp lực, nứt hoặc hư hỏng kính nào được nhìn thấy. | Dừng thao tác với màn hình; hư hỏng vật lý của tấm nền không thể được khắc phục bằng phần mềm. |
| So sánh cảnh báo hiển thị | So sánh các cảnh báo hiện tại với bản ghi trước khi lắp đặt. | Điều tra các cảnh báo mới xuất hiện thay vì coi đó là bình thường. |
| Hiển thị nhiên liệu | Sau khi tiếp nhiên liệu, xác nhận hành vi của đồng hồ và logic dung lượng có thể nạp lại. | Kiểm tra bo mạch nhỏ nếu có, sau đó thực hiện hiệu chuẩn dung tích bình nhiên liệu. |
| Hiển thị đèn xi-nhan | Xác nhận hành vi hiển thị của đèn xi-nhan trái và phải. | Kiểm tra rằng Physical Light không được bật sai nếu cài đặt này xuất hiện trong đường dẫn phần mềm được cung cấp. |
| Truy cập cáp USB | USB cập nhật và USB chiếu màn hình được hỗ trợ vẫn có thể truy cập. | Điều chỉnh đường đi của cáp trước khi đóng hoàn toàn bảng điều khiển. |
| Lắp đặt và ốp viền | Cụm đồng hồ nằm vừa vặn và ốp dưới không ép vào màn hình. | Mở lại bước tháo ốp và chỉ kiểm tra khe hở ở những vị trí thực sự cần điều chỉnh. |
| Các chức năng được hỗ trợ | Chỉ xác minh các chức năng đã được xác nhận cho xe và lộ trình sản phẩm được cung cấp. | Không được cho rằng mọi tính năng đều được giữ nguyên; hãy đối chiếu với trạng thái cơ sở đã xác nhận. |
| Ảnh phiên bản phần mềm | Hãy lưu một ảnh màn hình phiên bản đã cài đặt trước bất kỳ lần cập nhật nào sau này. | Không áp dụng gói cập nhật trực tuyến hoặc USB một cách tùy ý cho phiên bản chưa được ghi nhận. |
How This Audi Q5 8R Installation Guide Was Prepared and Verified
This article is maintained by the Đội ngũ Kỹ thuật iKAGOO for the first-generation Audi Q5 / SQ5 8R digital-cluster retrofit route documented on this page. The instructions are based on the vehicle-specific installation photographs, donor-board transfer references, auxiliary-board examples, video checkpoints, first-power-on checks and post-install calibration steps shown in the guide.
First-hand installation evidence
The article uses actual Q5 8R installation-stage images covering cluster removal, donor-cluster opening, original-board transfer, harness connection, power-on testing and lower-trim reassembly.
Compatibility is not inferred from a badge
Q5, SQ5, TFSI, TDI, quattro, Premium, Premium Plus or Prestige wording is not treated as automatic proof of compatibility. iKAGOO checks the vehicle year, original powered-on cluster, dashboard layout and LHD/RHD configuration.
Known limits are stated openly
Shared Audi/VW menu references, USB projection behavior, update routes and retained functions can vary by supplied version. The guide separates confirmed installation logic from version-dependent behavior.
Reviewed: 2 tháng 9, 2026
Phạm vi: compatible Audi Q5 / SQ5 8R mechanical-cluster retrofit route, with a 2009–2017 iKAGOO fitment boundary.
Editorial rule: if the exact vehicle or supplied cluster does not match a documented route, the article instructs the installer to stop and verify rather than assume compatibility.
Lộ trình gói nâng cấp Cụm đồng hồ Kỹ thuật số Audi / Volkswagen được hỗ trợ
FixMyDash is for supported Audi / Volkswagen digital cluster software upgrade package purchase and package-related support. It is a separate support route for compatible existing digital clusters. It is not a hardware repair service. It does not promise to repair screen damage, damaged boards, wiring faults, incorrect installation, communication faults or unrelated vehicle problems. Mua gói nâng cấp được hỗ trợ Xem hướng dẫn cập nhật trực tuyến / USBBạn cần bảng đồng hồ kỹ thuật số Audi Q5 8R phù hợp cho 2009–2017?
Khách hàng đang tìm lộ trình phần cứng bảng đồng hồ kỹ thuật số Audi Q5 8R iKagoo đầy đủ cho các mẫu tương thích Các mẫu Audi Q5 / SQ5 8R 2009–2017 nên sử dụng trang sản phẩm phù hợp và quy trình xác nhận lắp đặt trước khi đặt hàng. Xem sản phẩm bảng đồng hồ kỹ thuật số Audi Q5 Xác nhận độ tương thích với iKagooCâu hỏi lắp đặt Audi Q5 8R Virtual Cockpit
Is this guide for European and North American Audi Q5 8R models?
Yes, the guide is written around the first-generation Audi Q5 / SQ5 8R mechanical-cluster route used by owners in Europe and North America. The iKAGOO fitment boundary on this page remains 2009–2017. U.S. model-year 2018 and later Q5 vehicles are a different generation. European vehicles first registered in 2008 require individual confirmation before this 2009–2017 hardware route is used. Engine or trim wording such as TFSI, TDI, quattro, Premium, Premium Plus, Prestige or SQ5 does not replace original-cluster photo confirmation.








Add comment
Bạn phải đăng nhập để gửi bình luận.